How To Merge Videos In Windows 10?

The modern-day content industry relies heavily on video content. To create a video, multiple videos are merged together to create valuable content.
Whether you are creating a training video for your website or information content for your YouTube channel, there is a good chance you will find yourself needing different short videos.
Merging videos happens when you combine multiple short videos to form one cohesive video. By doing this, you will be able to use all the high-quality content together to make high-quality video content.
That said, for most, merging videos seems like a daunting task. However, you don’t have to panic. In this article, we have talked about the steps you need to merge your videos perfectly.
But before that…
What Is A Video Merger?

A video merger is a software tool or application that allows you to combine multiple video files into a single video.
It can be used to merge videos of different formats, resolutions, and aspect ratios and is often used for creating compilations, mashups, or longer videos from shorter segments.
Some video merger software also includes editing features such as –
- Support Multiple Video Formats: Most video merger apps support a wide range of video formats, such as MP4, AVI, MOV, and WMV.
- Drag-and-Drop Functionality: Many video merger apps use a drag-and-drop interface, making adding and arranging video files easy.
- Preview Feature: Some video merger apps include a preview feature that allows you to watch the video before merging.
- Cropping and Trimming: Some apps allow you to crop and trim the videos before merging to remove unwanted parts of the video.
- Transitions: Some video merger apps include options for adding transitions between the merged videos, such as fade in/out or crossfade.
- Audio Mixing: Some apps have the feature of mixing audio tracks of different videos together.
- Watermark and Subtitle: Some apps allow users to add a watermark and subtitle to the final video.
- Exporting Options: Video merger apps usually provide a variety of options for exporting the final video, including different resolutions, frame rates, and bit rates.
- Compatibility: Some apps are compatible with multiple operating systems and devices.
- Batch Processing: Some apps allow users to merge multiple videos simultaneously, saving time and effort.
How To Merge Videos In Windows 10?

Method 1: Using The Built-In Photos App
- Open the Photos app by searching for it in the Start menu or by clicking on the Photos tile on the Start menu.
- Click on the “Create” button in the top right corner of the app.
- Select “Video project” from the menu.
- Click the “Add videos and photos” button to select the videos you want to merge.
- Drag and drop the selected videos to the timeline in the order you want them to appear in the final video.
- Click on the “Play” button to preview the merged video.
- Click on the “Export” button to save the final video.
Method 2: Using A Third-Party Video Merger Software
- Download and install video merger software such as Windows Movie Maker, VSDC Free Video Editor, or OpenShot Video Editor.
- Open the software and import the videos you want to merge.
- Drag and drop the videos to the timeline in the order you want them to appear in the final video.
- Use the editing tools provided by the software to trim, crop, and add transitions between the videos.
- Preview the final video to ensure it is to your satisfaction.
- Export the final video to your desired format and save it to your computer.
Method 3: Using Command Prompt
- Press Windows Key + R to open the Command Prompt.
- Navigate to the videos’ folder by typing the CD path/to/folder and pressing Enter.
- Type copy /b video1.mp4 + video2.mp4 finalvideo.mp4 to merge the videos and press Enter.
- The final video will be saved as “finalvideo.mp4” in the same folder as the original videos.
Note: Some third-party software may require a purchase to access all its features. Also, please ensure the videos are in the same format, resolution, and aspect ratio before merging.
How To Merge Videos For Free In Windows 10?
There are several ways you can follow to merge videos for free in Windows 10. You need to get through the absolute process that will assist you in reaching your requirements with complete ease. You need to identify the perfect options that can make things easier for you in attaining your requirements with ease.
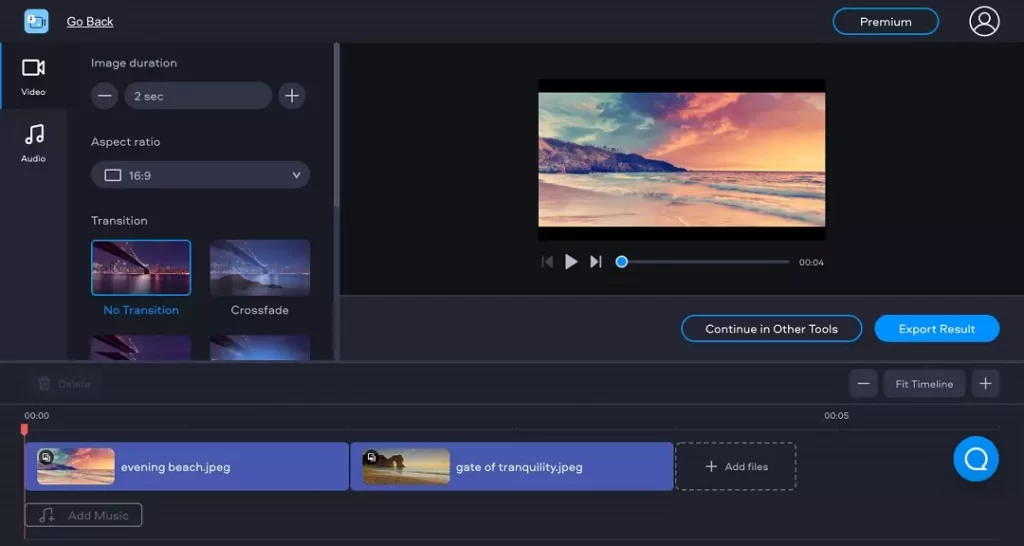
Step -1: Upload Your Footage
It offers three workarounds to get all the media files. You need to import from media files. You can transfer all the videos from your phone via all the QR codes. Instantly, you can shoot one by one. You can pick your favorite way to import all the clips.
Step -2: Customize The Clips
You can drag the tips from all the timelines. After that, you have to arrange the videos as per your sequence to match your needs. You can make the videos more seamless while you make the transitions between the two scenes.
Step -3: Export The Video
After you finish the editing process, you have to click on the export button to make things work well for you in all possible ways. Try out the perfect ways that can help you to merge the videos in Windows 10.
You can follow some of the steps mentioned above to make things work well for you in all possible ways. You need to get through the complete process to get the process done in perfect order.
What To Consider When Merging Video Clips?

Merging videos might seem like an overwhelming task. No matter how experienced you are, there are always possibilities of you making a mistake.
When merging different videos to make one cohesive video, there are a few things you need to consider.
A. Trimming & Cutting
When you shoot a video for your content, not every clip is perfect from start to finish. This is where you need to trim the video to keep only the perfect shots.
B. Color Correction
Even if you are wearing the same t-shirt, the color might look different while shooting the video. This happens because of the difference in light and location. Before releasing the video content, you need to match all the colors properly to look consistent.
C. Maintaining The Quality
Finally, it is important that the quality is maintained throughout the edits. When you merge two different videos, there is a possibility that the quality gets hampered. For instance, if one clip has a low resolution, you may want to reduce the resolution of all the other videos before merging.
Check out this YouTube video: How to Merge Videos in Windows 10 | Combine Video Files | Free
Wrapping Up
Yes, merging two videos is sometimes stressful. But with Windows 10, it is super simple with the built-in apps like Photos and Video Editor.
For instance, if you want your photos and videos to look more professional, Windows comes with an in-built app, InVideo. InVideo helps create high-quality videos in a matter of minutes.
With this, we conclude our article here. We hope that you like this article and were able to find the different methods helpful.
If there are any other methods that you are aware of, feel free to share them in the comment section. We can assure you that our readers will find them helpful.
Read Also:


